DPG PRP Centrifuge
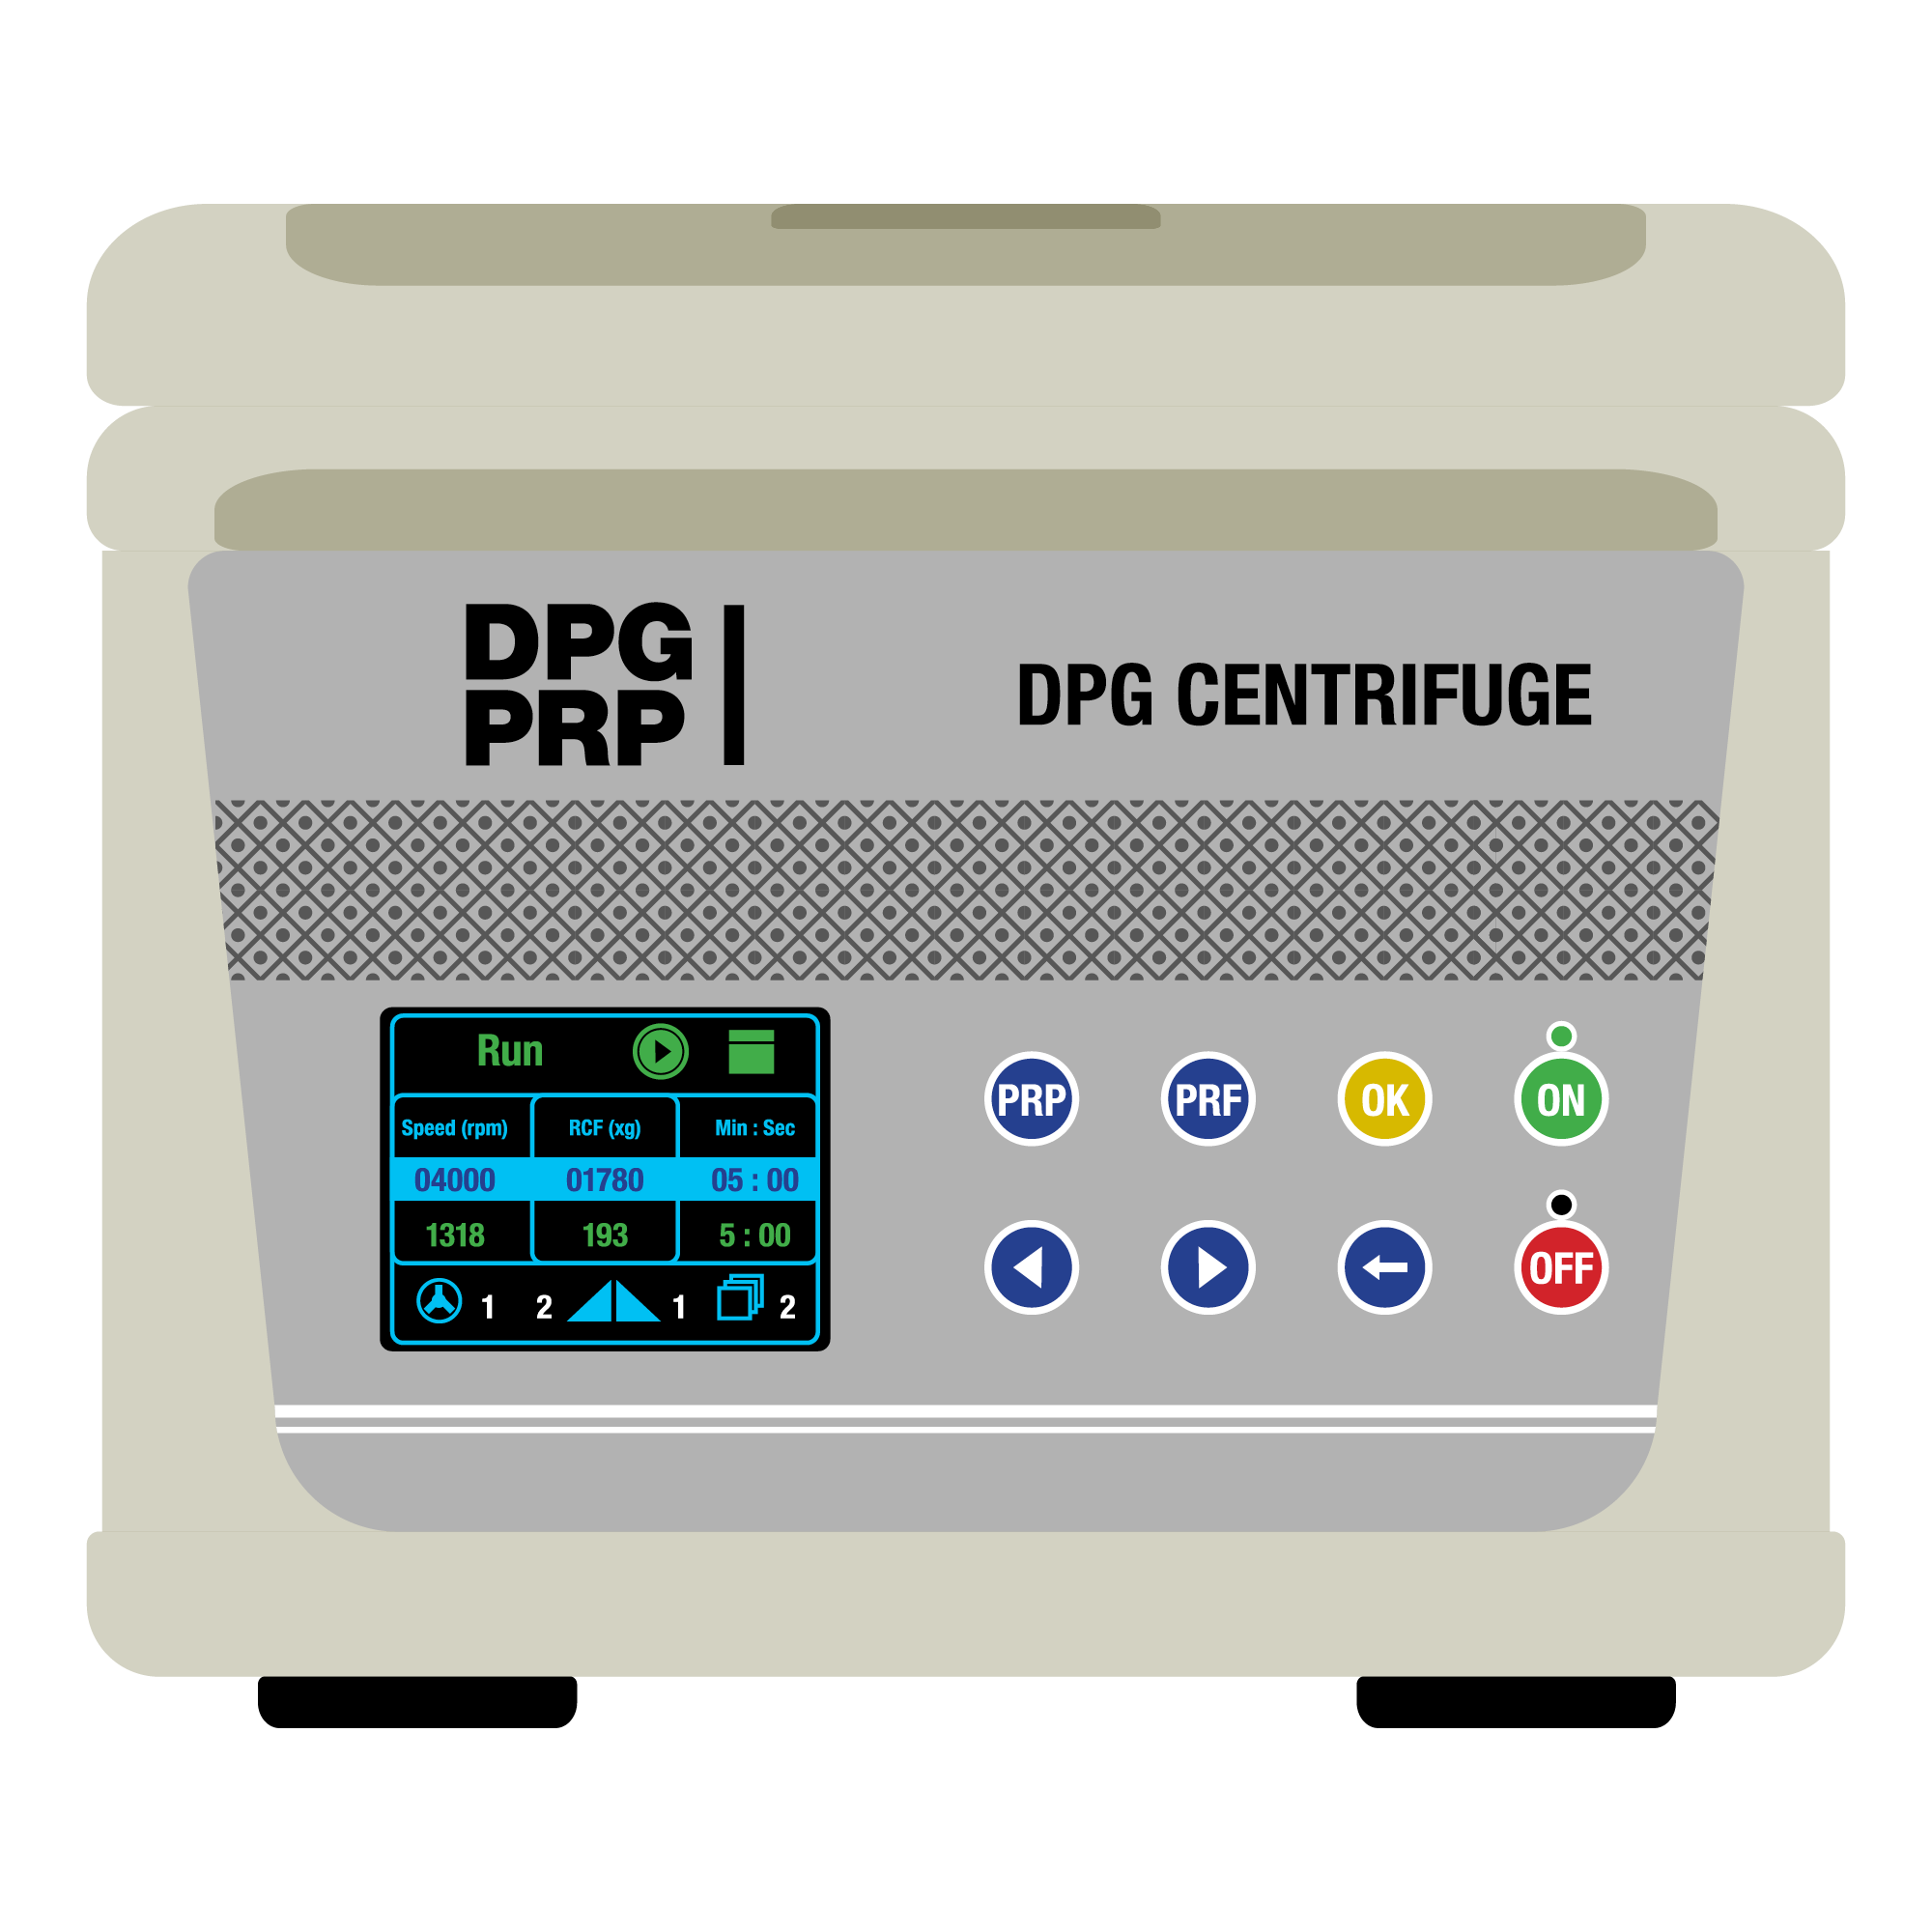
LC-04P-S Centrifuge
OPERATION MANUAL, MAINTENANCE & INSTRUCTIONS
1. GENERAL
2. DESIGN FEATURES
2.2 Gradually accelerate to desired Speed.
2.3 Door switch and mechanical safety lock.
3. PRINCIPLE OF OPERATION
The formula of calculating RCF is as follows:
RCF=1.118××10-5n2r
n——– rotating speed
r——– radius of rotating
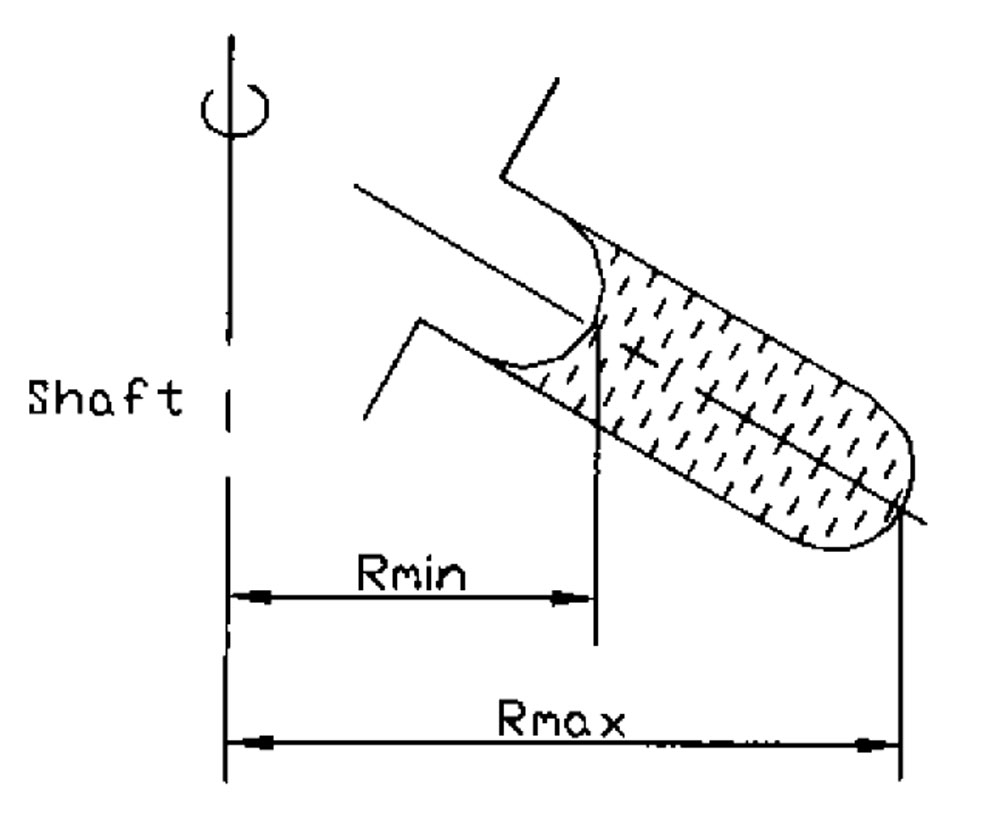
The formula of calculating separation time is as follows:
27.4(logeRmax-logeRmin)μ (min)
n2r2(Q-ρ)
ρ——– density of mixed liquid (g/cm3)
μ——– glutinousness of mixed liquid (p)
n——– rotating speed
r——– radius of particle (cm)
Q——- density of particle (g/cm3)
Rmax——– The horizontal distance from the bottom of solution to the center of the rotating axis (cm)
Rmin——– The horizontal distance from the surface of solution to the center of the rotating axis (cm)
4. SPECIFICATION
Max. RCF: 1780××g
Capacity: 8×15/10 ml
Time range: 0-99 min
Power source: 110-240V 50/60Hz
Power supply: 135W
Dimension: 280×250×240mm
Net weight: 5Kg
Noise: <70dB
5. PARTS IDENTIFICATION
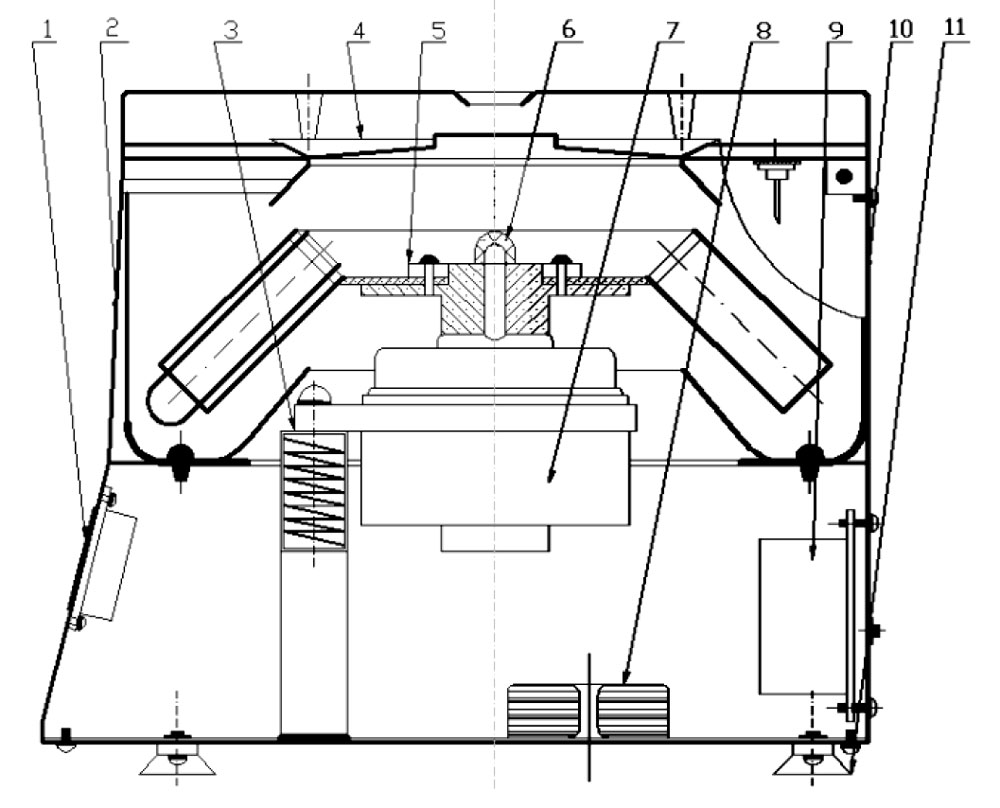
1. Control panel
2. Frame work
3. Damping system
4. Cover
5. Rotor
6. Nut
7. Motor
8. Toroidal transformer
9. Electric controlling system
10. Centrifugal chamber
11. Suction Cups
6. USING CONDITIONS
6.2 Relative moisture: <80%
6.3 No electro conductive dust, explosive and corrosive gas in the surrounding air
7. OPERATION PROCEDURE
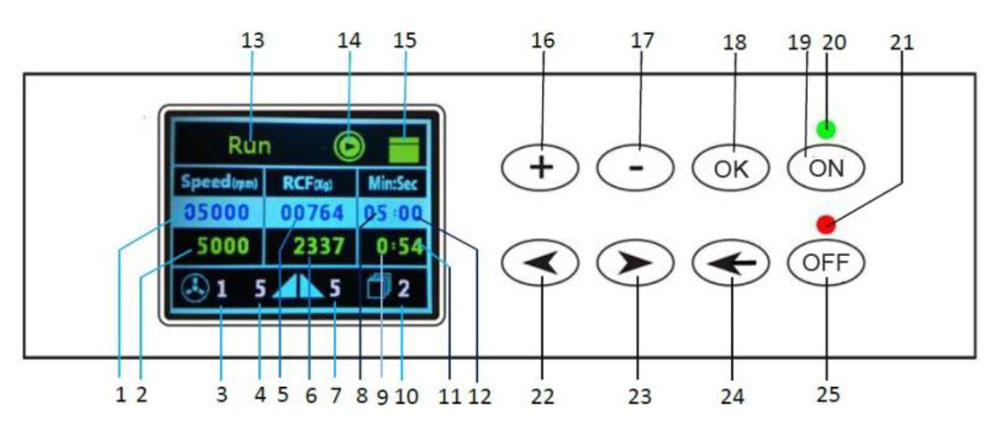
1. Set speed
2. Dynamic speed
3. Rotor NO.
4. Up speed
5. Set RCF
6. Dynamic RCF
7. Speed down
8. Set MIN time
9. Dynamic MIN.time
10. Program group
11. Dynamic SEC.time
12. Set SEC. time
13. Information prompt
14. Icon of start and stop status
15. Icon of door status
16. “+” add
17. “-” subtract
18. Confirm
19. Start
20. Indicator light of run
21. Indicator light of stop calculation
22. Left shift
23. Right shift
24. Cancel
25. Stop/open the door
Preparation
○
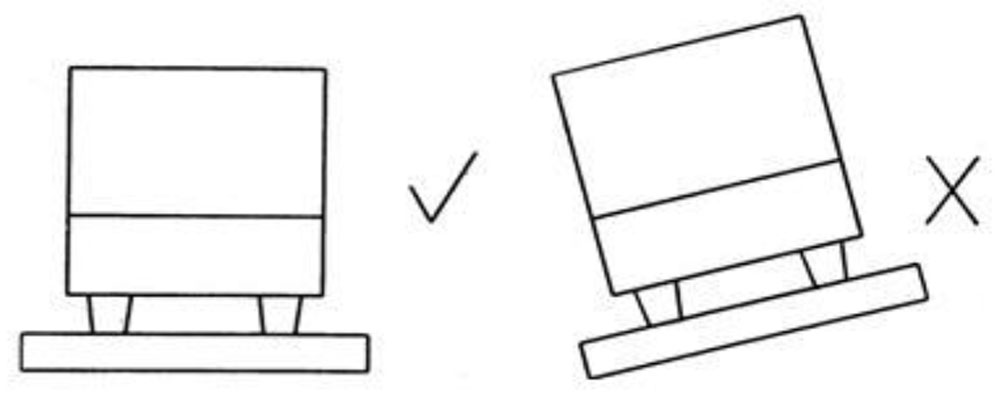
1 Place the centrifuge on a steady table, the centrifuge must be 10cm distance from the wall.
○
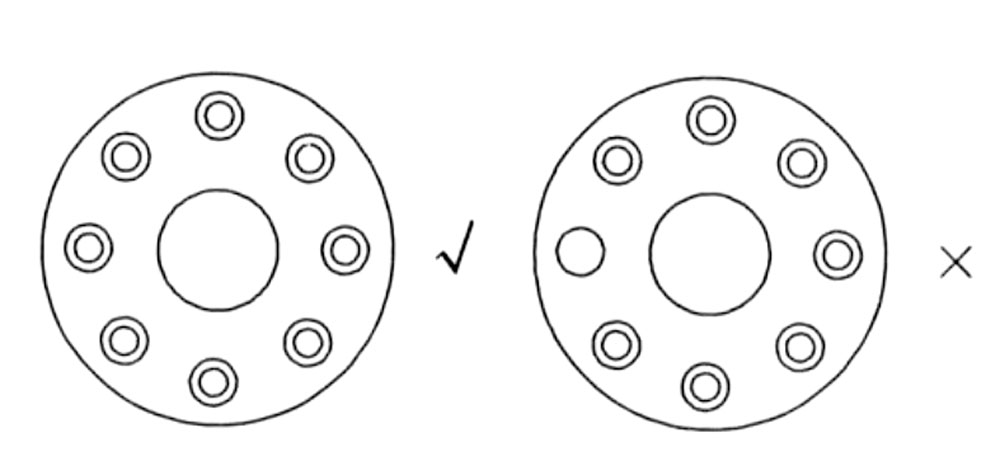
2 Place tubes with sample(s) in a symmetrical order, so rotor can be balanced.
7.2 Operation Steps:
Shut the cover, connect the power. Press the power button on,
1. Revise speed
Select Through left and right shift, set speed, when press “+”, Parameter value plus ten, press a second don’t put, continuous plus 100 when press ”-” Parameter value reduce ten, press a second don’t put, continuous reduce 100. Press confirm to ensure the parameter press “cancel” to revise the parameter.
2. Revise RCF
Select Through left and right shift, set RCF, when press “+”, Parameter value plus ten, press a second don’t put, continuous plus 10 when press ”-” Parameter value reduce ten, press a second don’t put, continuous reduce 10. Press “confirm” to ensure the parameter press “cancel” to revise the parameter.
3. Revise time
Select Through left and right shift, set time, when press “+”, Parameter value plus one, press a second don’t put, continuous plus one when press ”-” Parameter value reduce one, press a second don’t put, continuous reduce one. Press “confirm” to ensure the parameter press “cancel” to revise the parameter.
4. Revise up speed
Select Through left and right shift, set up speed, when press “+”, Parameter value plus one, press a second don’t put, continuous plus one when press ”-” Parameter value reduce one, press a second don’t put, continuous reduce one. Press “confirm” to ensure the parameter press “cancel” to revise the parameter (value larger speed slower, value smaller speed faster).
5. Revise speed down
Select Through left and right shift, set speed down, when press “+”, Parameter value plus one, press a second don’t put, continuous plus one when press ”-” Parameter value reduce one, press a second don’t put, continuous reduce one. Press “confirm” to ensure the parameter press “cancel” to revise the parameter (value larger speed slower, value smaller speed faster).
8. MAINTENANCE
8.2 If you found test tubes were aging or corroded before using it, please replace them in a timely manner.
8.3 The power should have reliable grounding.
8.4 The test tube with sample(s) must be placed in a balanced manner. Put into the rotor symmetrically to keep balance.
8.5 Power should be cut off as soon as abnormal noise is heard.
8.6 Don’t unplug the machine while it is in use.
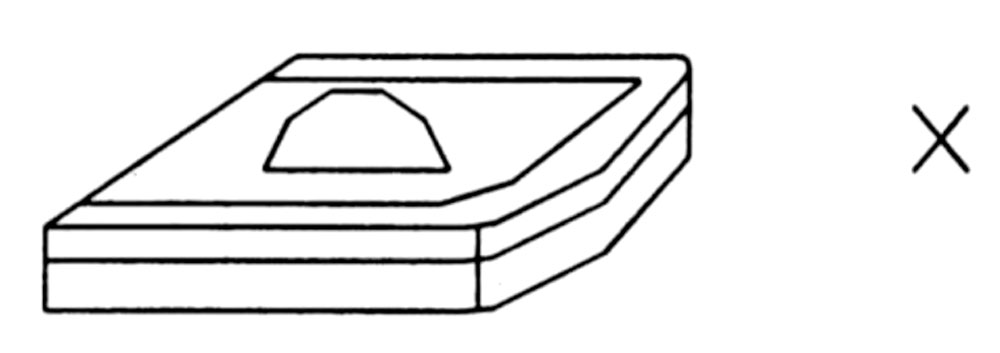
8.7 Don’t put any goods on the machine cover.
8.8 If the sample density is more than 1.2 g/cm3, you must calculate Max. speed(N) in the following formula:
N=Nmax √1.2/ρ
Nmax——– the limit speed
ρ ——– sample density
9. WARRANTY
10. COMMON ISSUES & RESOLUTION
| No. | Common issue | Reason | Solution |
| 1 | The power is connected, but the indicator and nixie tube don’t light up | - No power | - Check the power |
| - Blown fuse | - Replace | ||
| - Power switch doesn’t turn on | - Turn on power switch | ||
| 2 | The set speed and actual speed are different | Voltage is on the high side or low side | Contact our technical support department |
| 3 | Door lock doesn’t lock | Door lock | Check and Replace |
| 4 | There is noise after starting the machine | Tubes are not symmetrical or rotor nut is loosen | Place tubes symmetrically, tighten the nut |
| 5 | Machine doesn’t work according to adjusted value | Didn’t press Ok key to confirm | To reset value press Ok key to confirm |
| Fault code | Fault type | Solving method | Remark |
| E2 | Over speed problem | Turn off the electricity, restart | |
| DOOR open | Door cover not closed | Close the door cover then run | |
| E4 | When run, the door open | Check the door lock damaged | If the door not closed well, close it, run after clear fault |
| E7 | Zero speed fault | Turn off the electricity, restart | Run after 5 seconds later |
| E8 | Communication fault | Turn off the electricity, restart | If can’t solve, back it to the factory |
Press cancel or stop to clear fault.
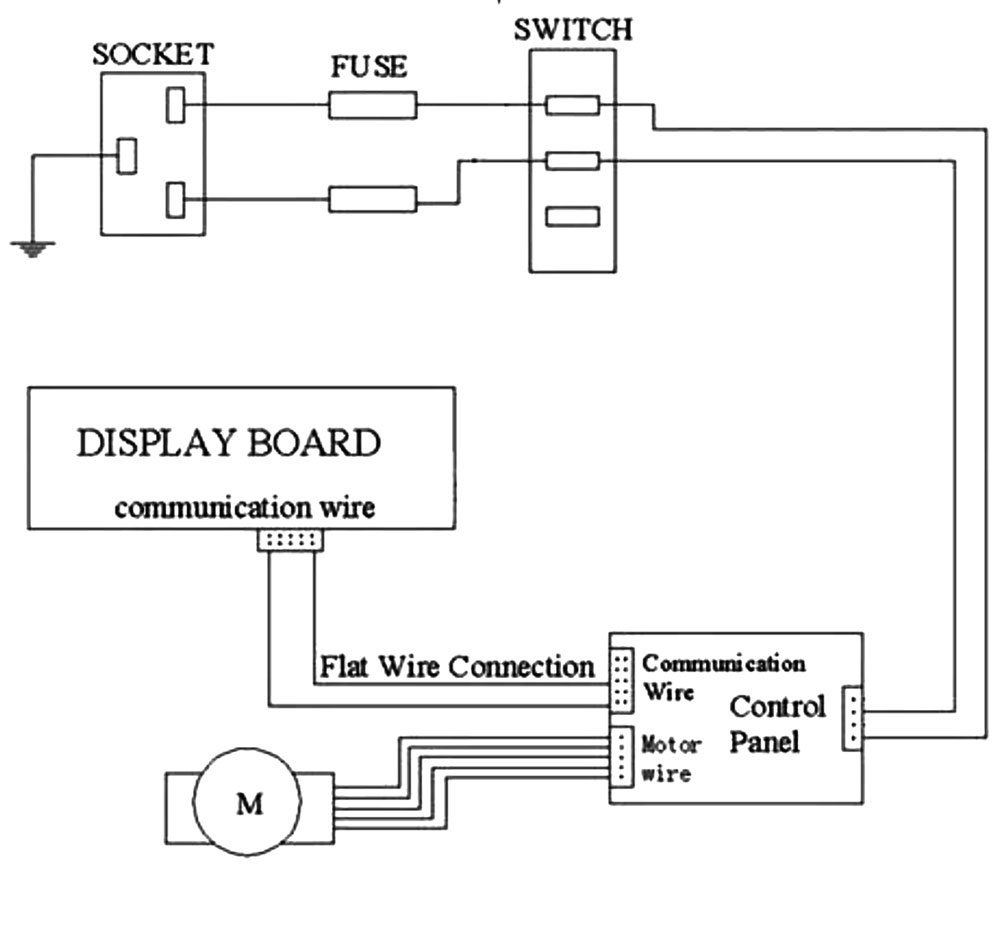
11. CIRCUIT DIAGRAM
Medical Application Field
Products


